How to Bend Over Without Hurting Your Back
Earlier this year, I strained my lower back. During those first few days of injury, I realized how many times I needed to bend over throughout the day. Whether I was putting on a sock, picking up my gym bag, collecting laundry, loading the dishwasher, toweling off, or moving gym equipment, I had to be extra careful to protect my lower back. The secret to protecting my back wasn’t to stop bending, but to emphasize my hip hinge.
A hip hinge is a movement pattern where you bend forward by pushing your hips straight back while maintaining a straight spine and vertical shins. We all do variations of hip hinges throughout the day as we carry on with our daily activities. It’s very important to train this movement pattern to make your daily activities easier and to reduce the risk of lower back pain.
How to Perform a Basic Hip Hinge
Stand tall with your feet about hip-width apart and your arms by your side.
While keeping your spine straight and your knees soft, bend at the hips by pushing your hips straight back and lowering your torso forward. Allow the hamstrings to stretch during this movement and allow the arms to hang freely (vertically).
Once the hips can no longer go further back, stop lowering your torso. Remember, the hips are the driver of this movement. It tells the rest of the body what to do.
To come back up, push the floor away, drive the hips forward, and stand tall. I like to use the cue “push the floor away” because clients are more likely to initiate the movement with their legs than their lower back.
Stand up tall with a neutral spine as noted in the first step.
My Favorite Ways to Coach the Hip Hinge
The hip hinge can be a tricky and frustrating movement to master. It may take one session or multiple sessions to get the general feel of the pattern.
Some common mistakes I see are the lower back overextending, muscles over tensing, knees bending forward, and spine rounding, which we address below.
I prefer to set my clients in positions that will guide them into the hip hinge. This leads to less overthinking and frustration while improving the success rate.
Here are some of my favorite ways to coach a client into a hip hinge.
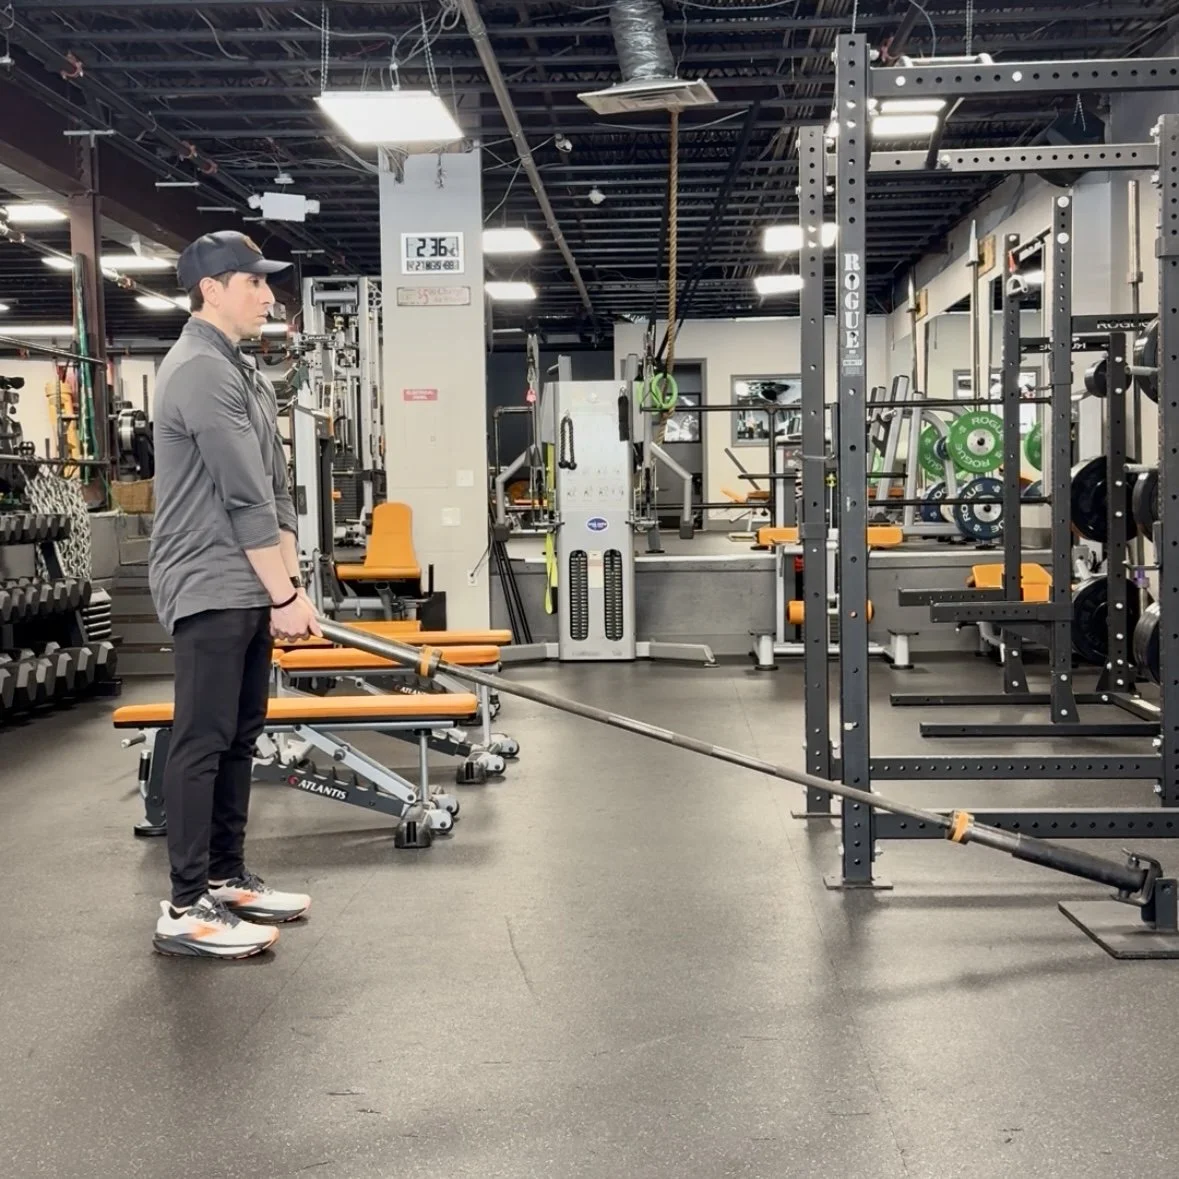
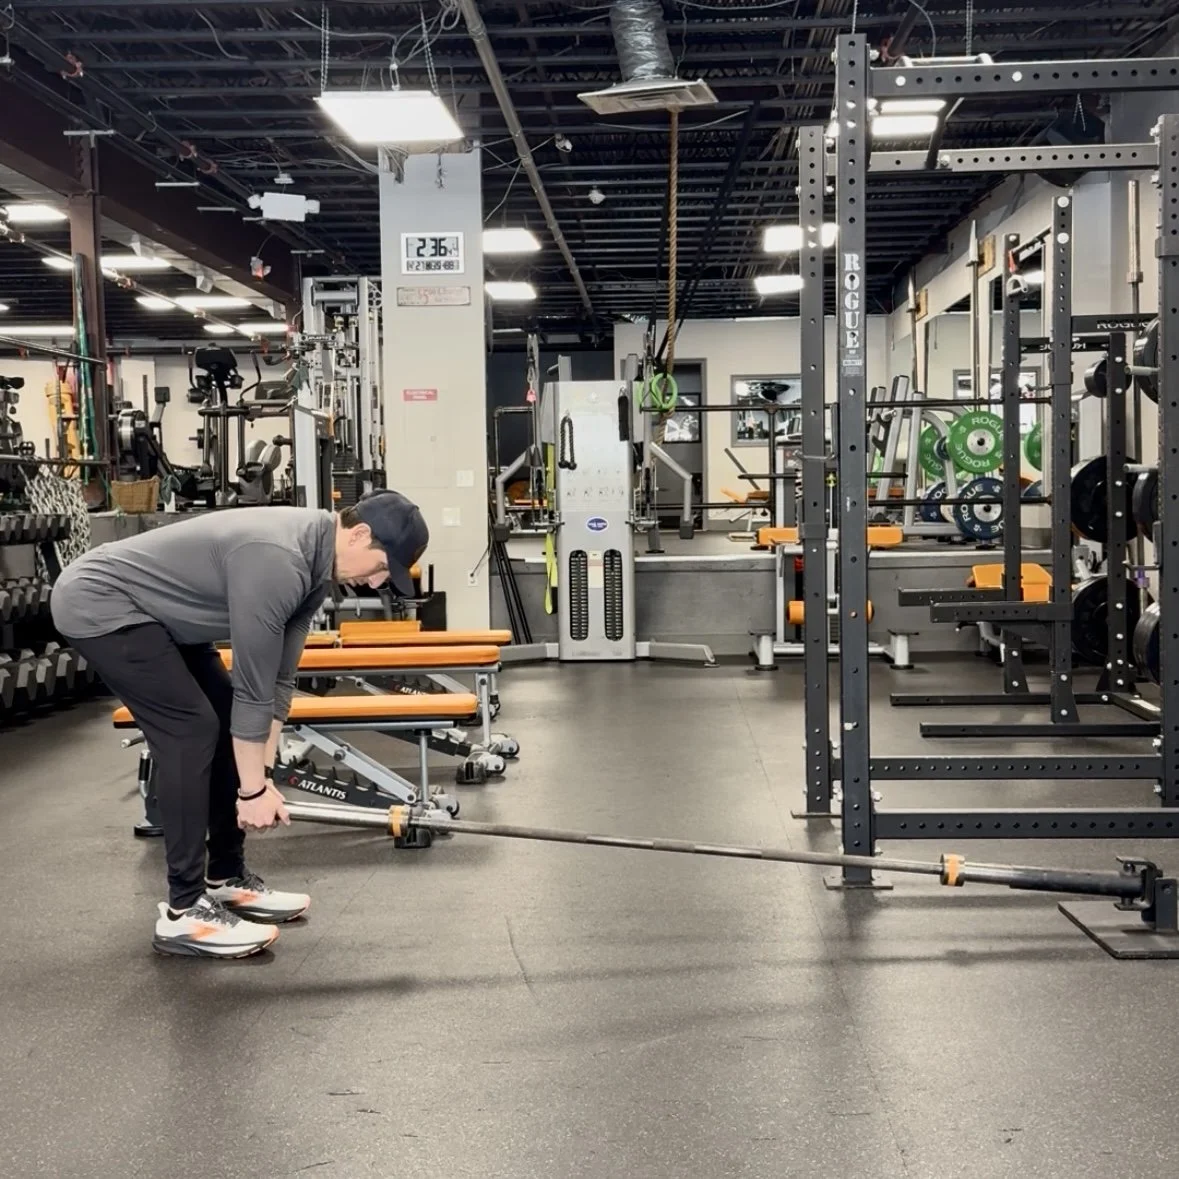
Landmine Hip Hinge
Overextending or arching the back at the top of the hip hinge movement can lead to excessive tension on the lower back. In order to avoid this mistake, you can use a landmine.
Most gyms have a landmine (far right in the pictures above), which can be used to anchor a barbell.
Stand tall in front of the end of the barbell while holding the very end with both hands. Perform the hip hinge movement as described above. The beauty of the landmine is that it will force your hips to go back as you bend down due to the arc movement pattern. More importantly, when you come up, it won’t allow you to drive your hips into an overextending forward motion or else your pelvis will hit the bar.
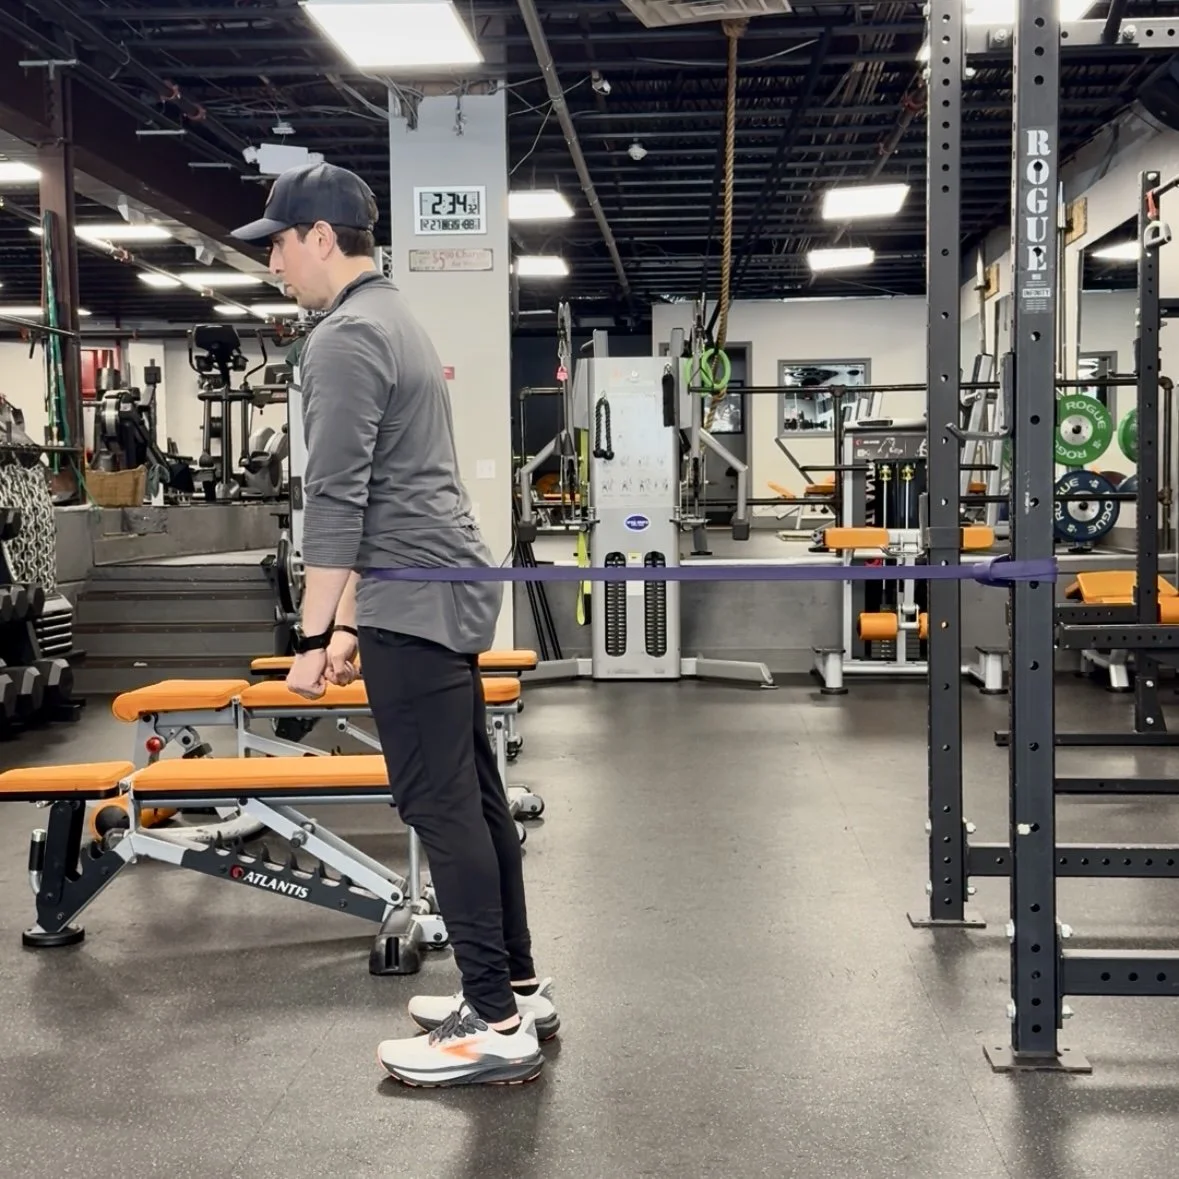
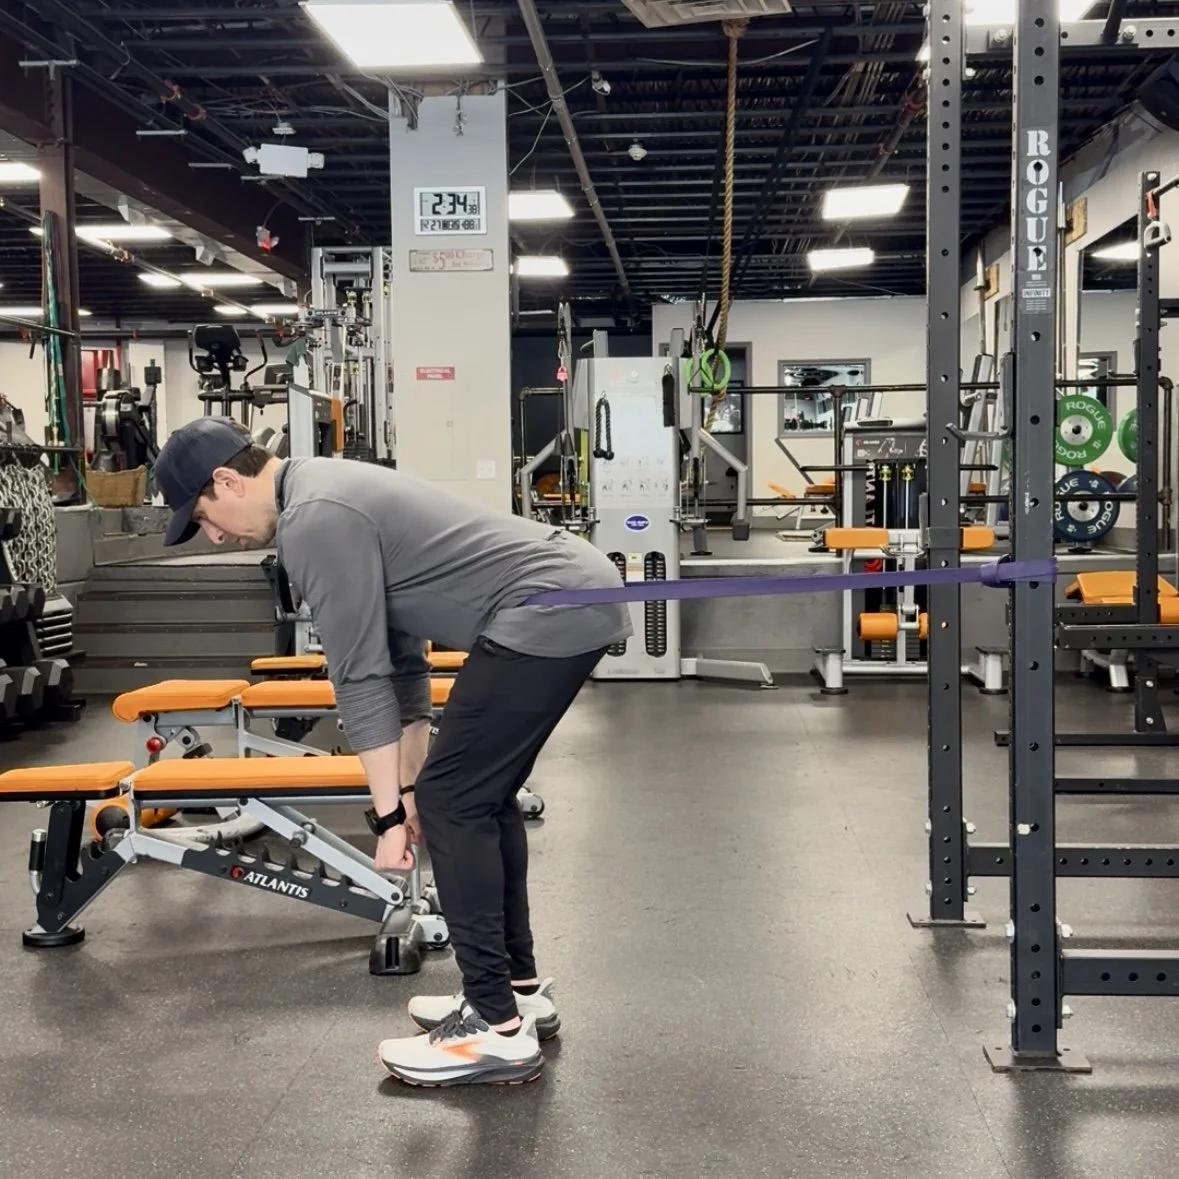
Band Hip Hinge
Sometimes muscle tension can be too high when performing a hip hinge. The hamstrings need to relax in order to stretch as the hips go back. A looped band can help guide the hips back while the body stays fairly relaxed.
You can start with a low tension looped band. Loop it around a pole and step inside the loop. Position the band on top of the hip crease. Walk forward until there is some tension on the band. Then, perform the hip hinge movement as described above.
Bench Hip Hinge
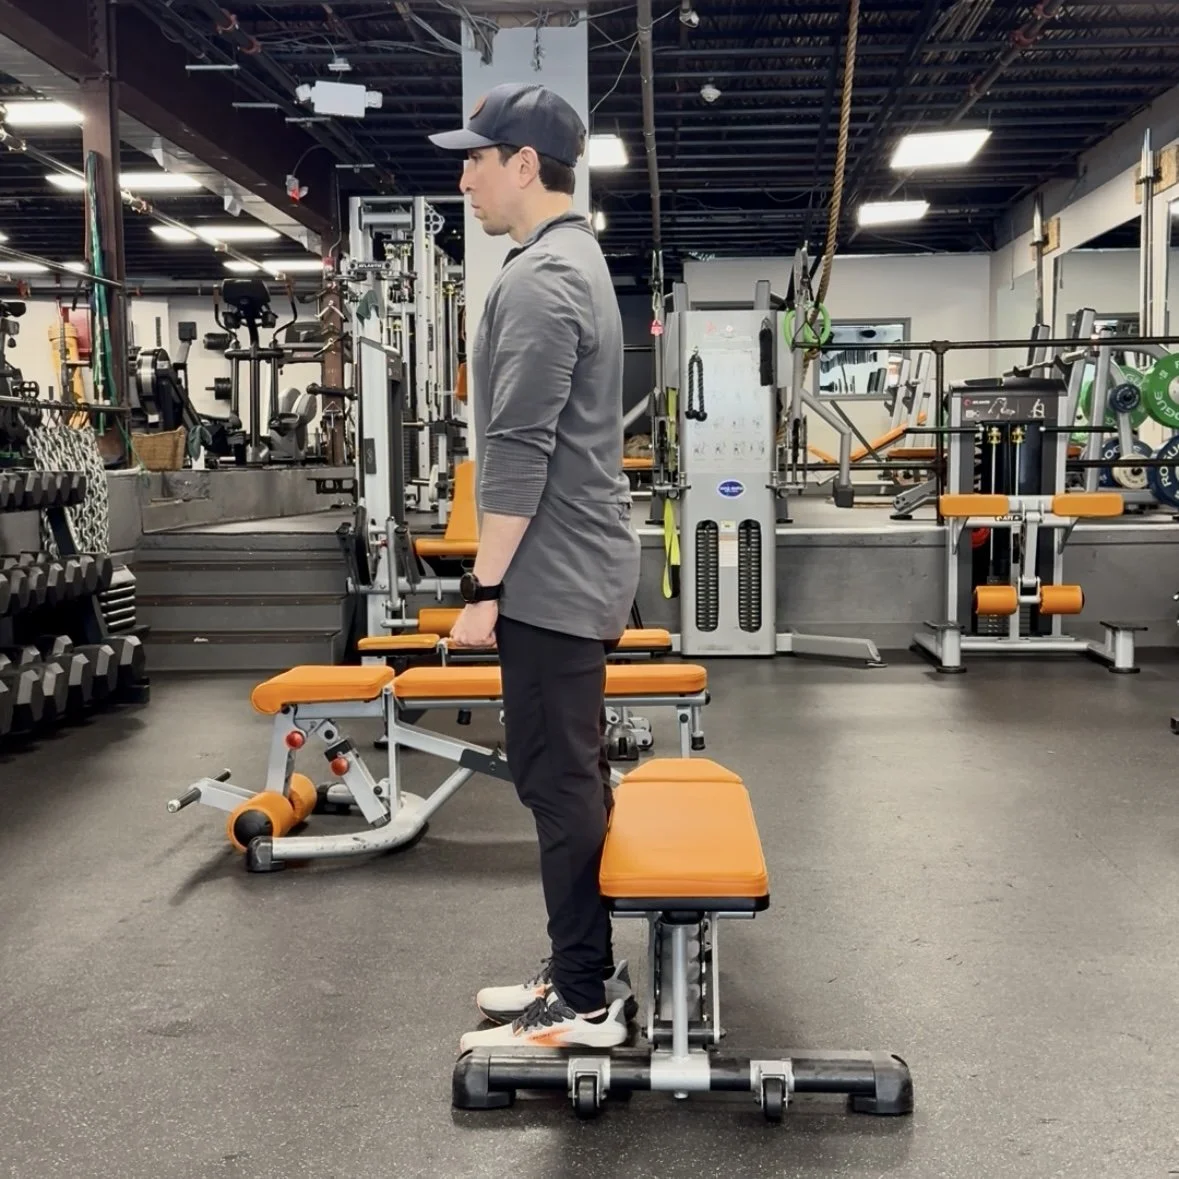
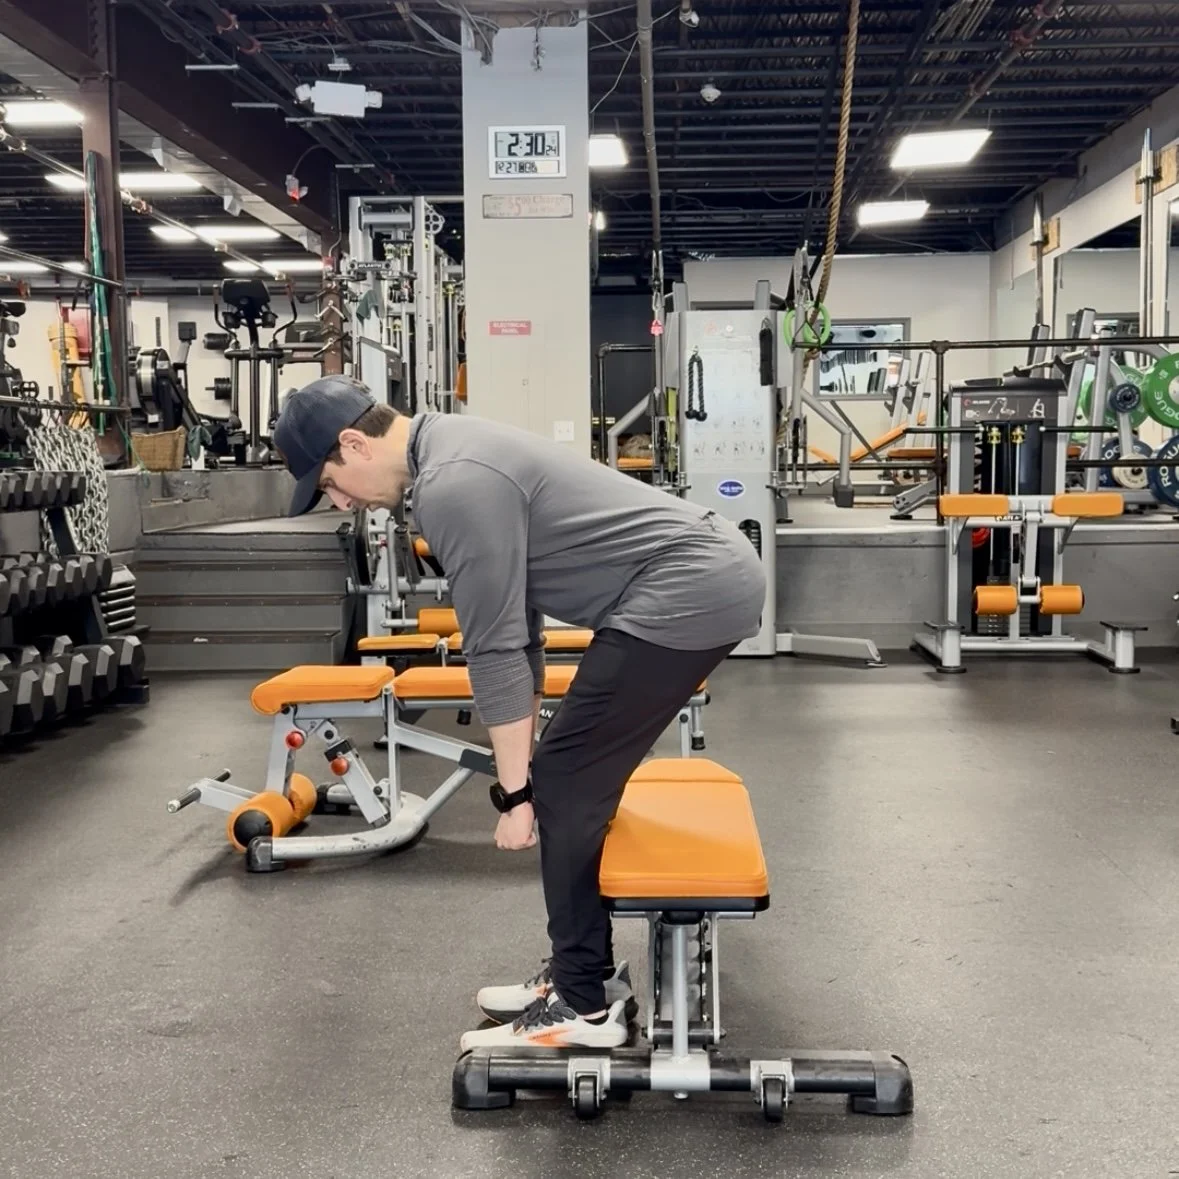
A very common mistake is bending the knees too much and lowering the hips rather than pushing them back. This mistake makes the hip hinge look more like a squat. Keeping the back of your calves pressed against a bench during a hip hinge can be a great way to prevent the knees from going forward.
Stand in front of a bench with the back of your knees or calves lightly pressed against the bench. As you proceed with your hip hinge movement make sure to keep the legs gently pressed against the bench. If you feel your legs come off the bench, that means you are bending your knee forward.
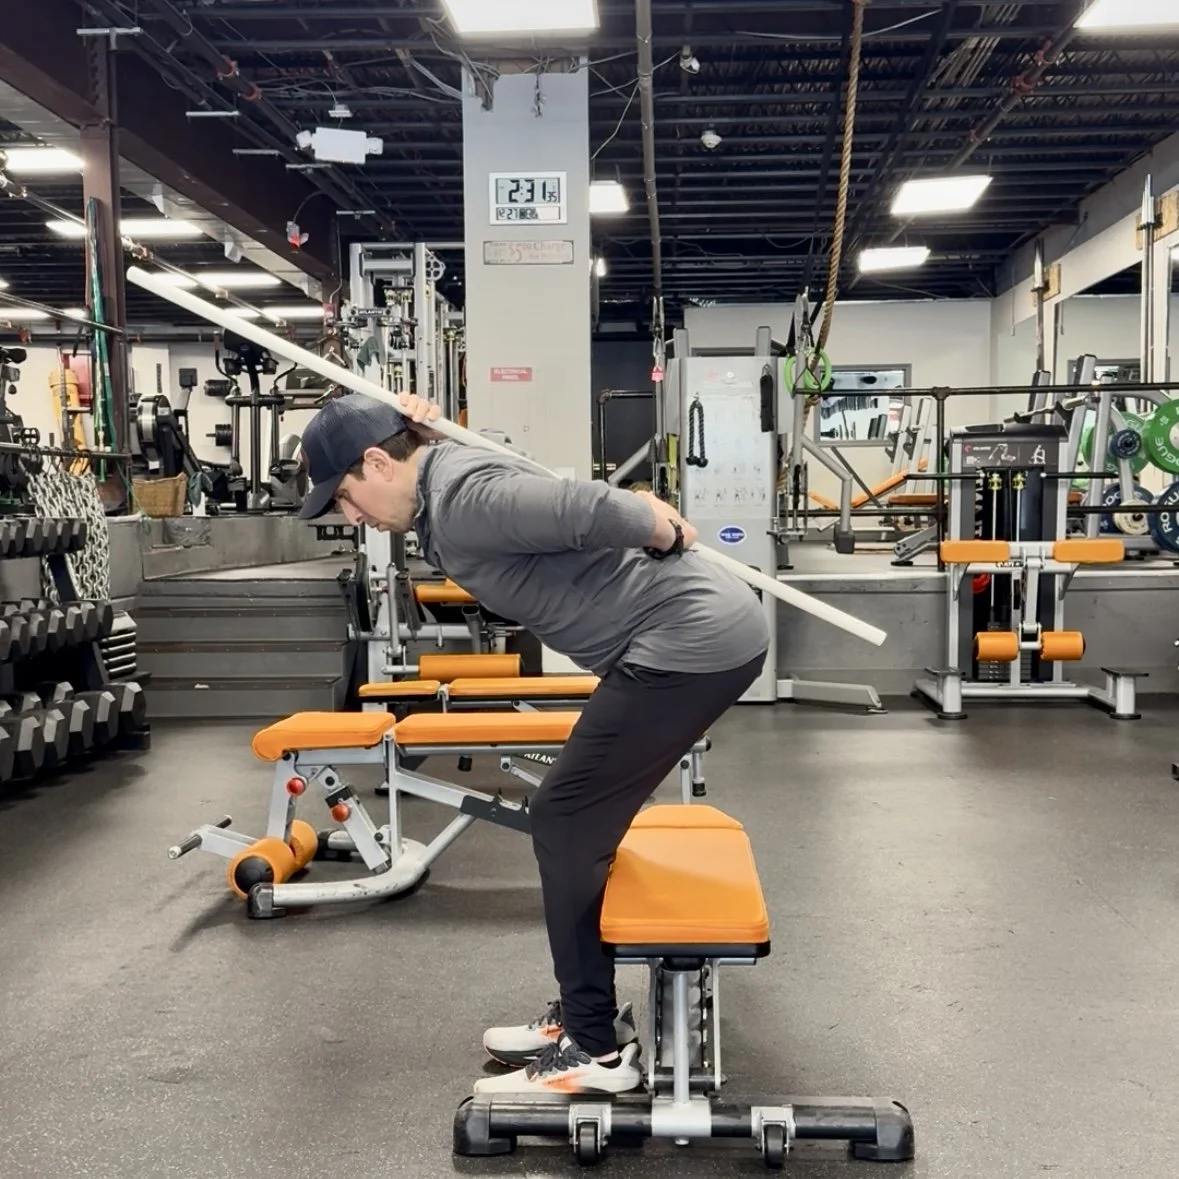
Dowel Hip Hinge
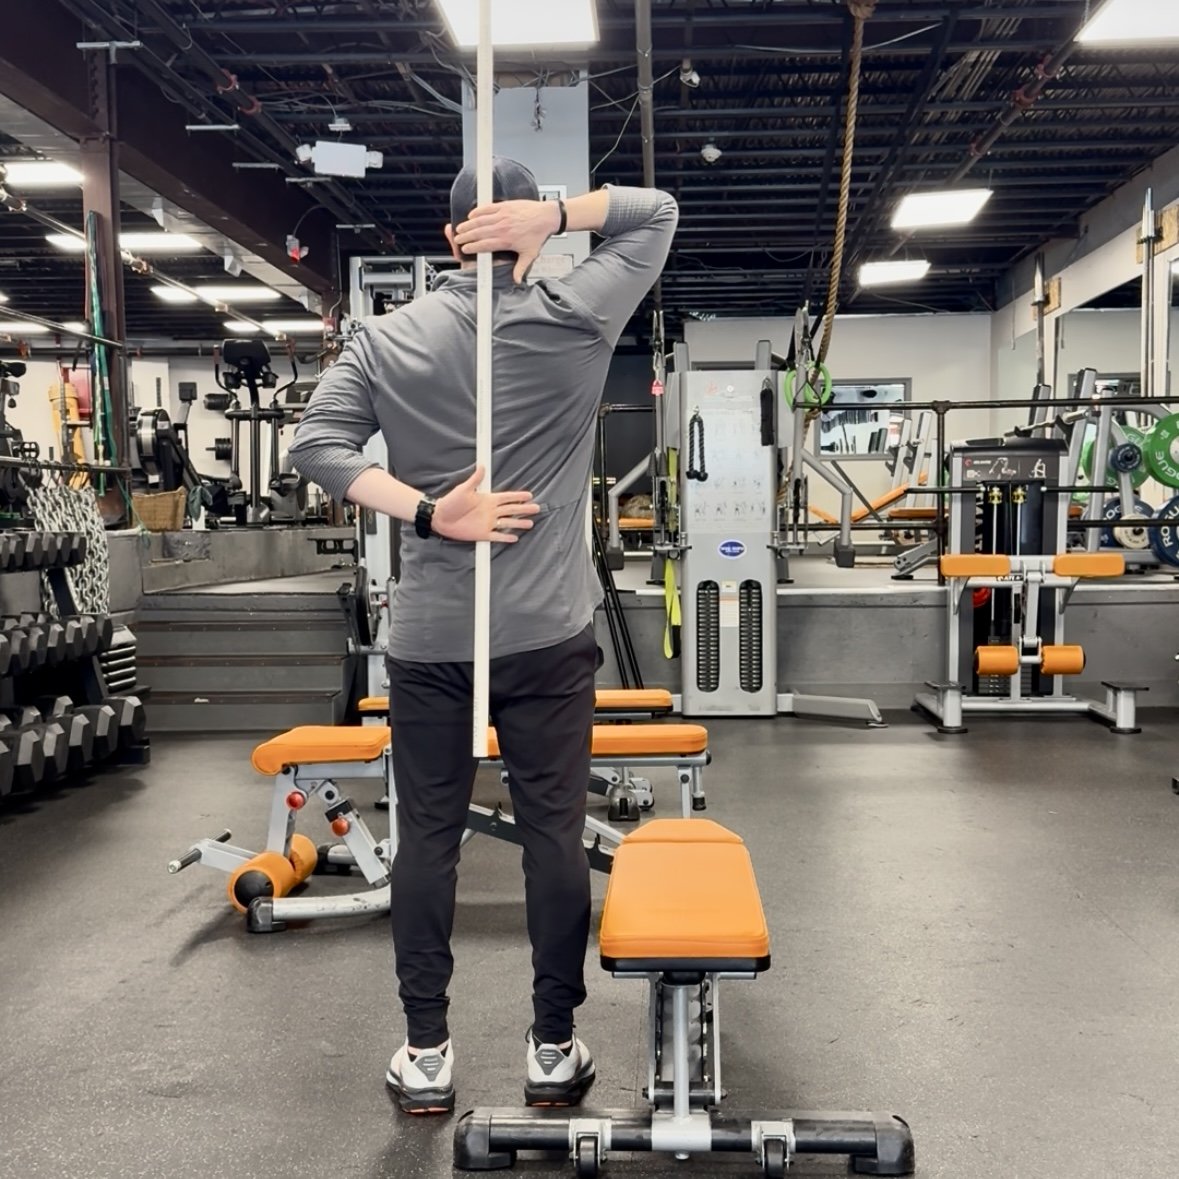
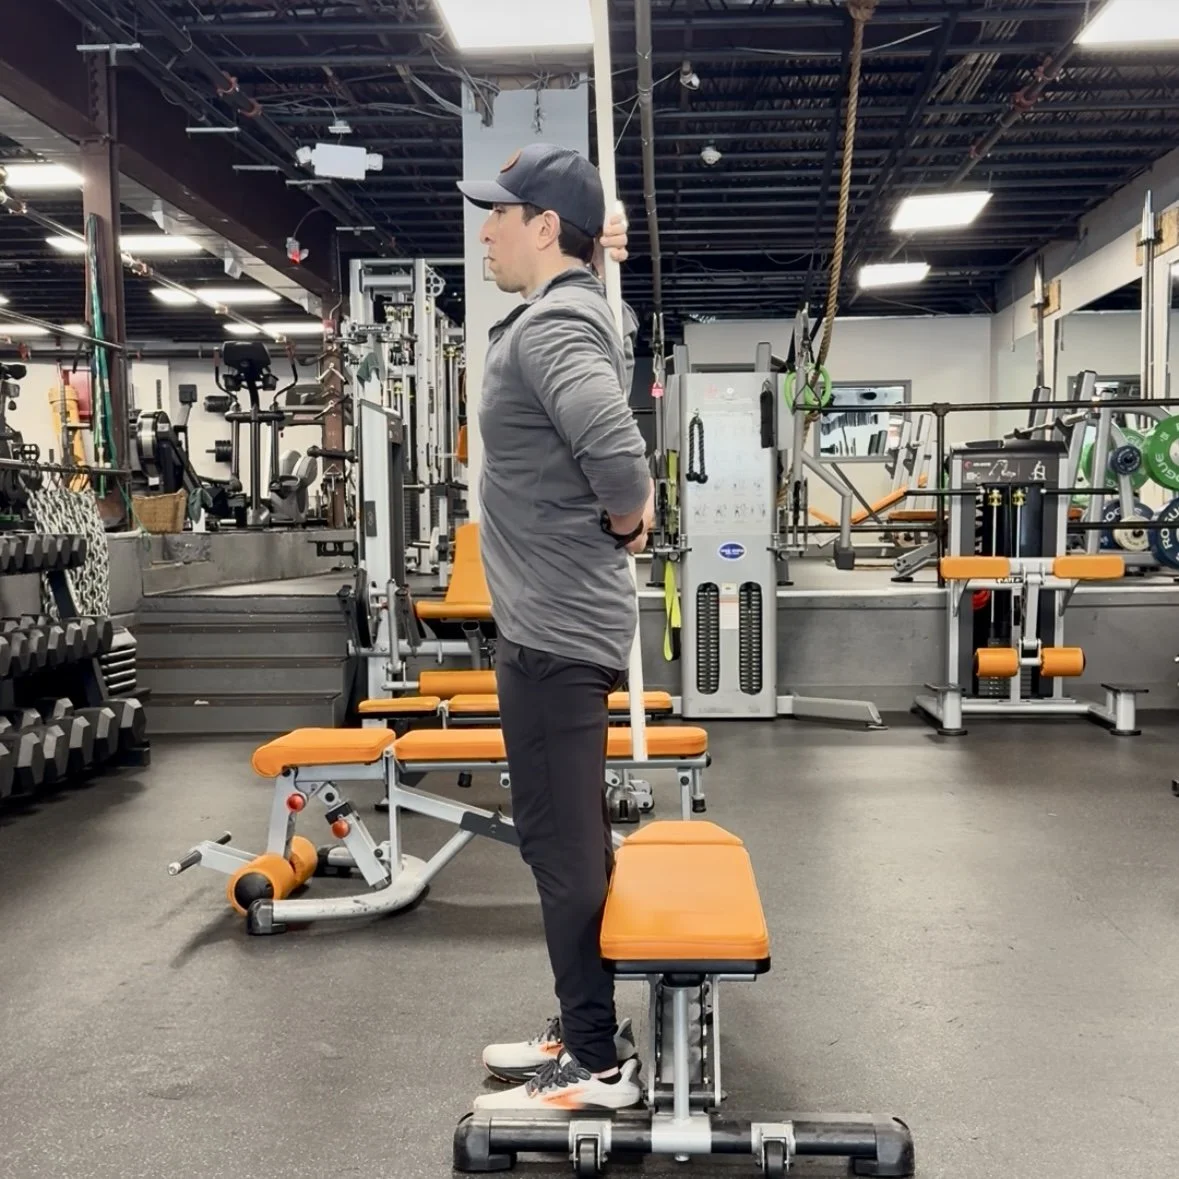
The most common mistake I see during a hip hinge is the rounding of the back. Flexing the spine, rather than hinging at the hips, puts stress on the lower back. By pressing a dowel or pole along our spine, we can ensure our back stays straight during a hip hinge.
Align the dowel right along the spine by making contact with the back of the head, upper back, and tailbone. Perform the hip hinge movement, described above, while maintaining those three points of contact. If you lose any of those points of contact, your back is rounding. I like to combine this dowel hip hinge with the bench hip hinge for most of my clients.
Found this interesting? Sign up to my free weekly newsletter for more.